

When you've chosen your yarn and once you've done a little swatching and decided what motif you're going to go with for your blanket, it's time to do some maths. Don't worry, it's nothing too scary.
The first thing you need to think about is how big your blanket is going to be. Single, double, lap, king, maybe it's for a baby. I used this source for a list of sizes.

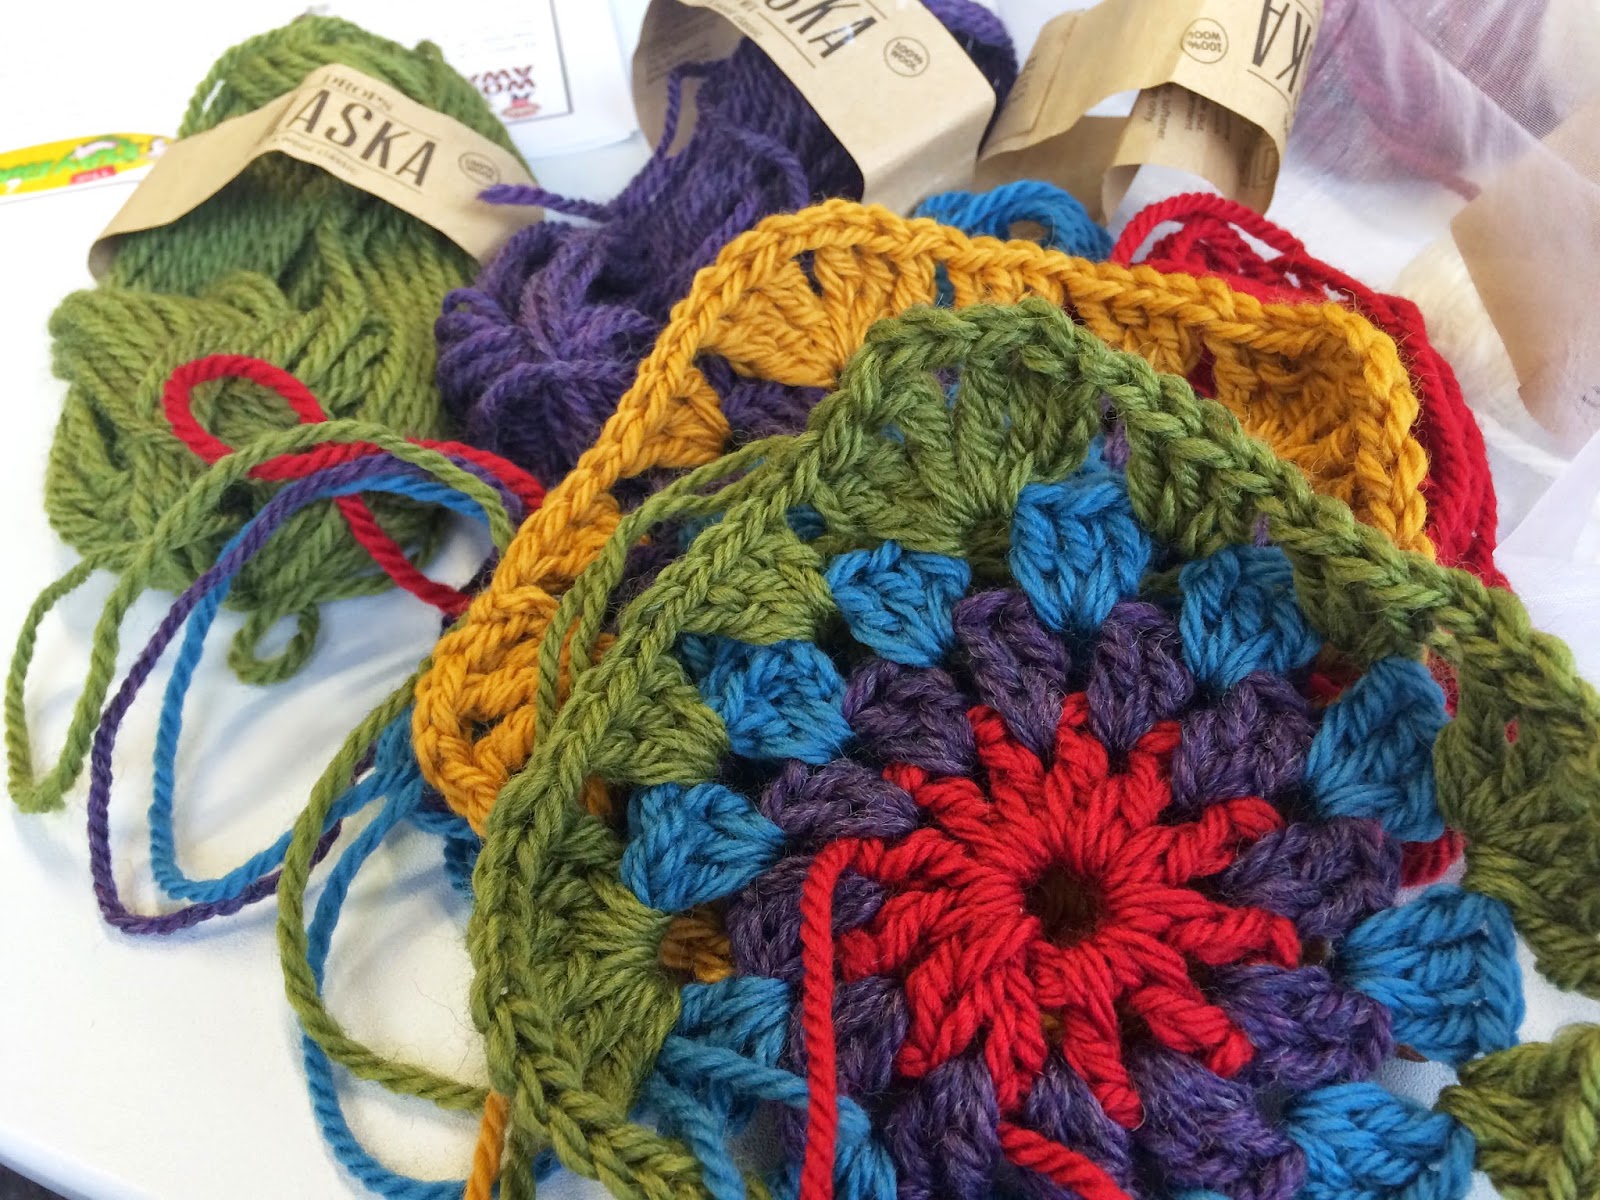
Next up, how big are your motifs? How are you going to join them? If you're going to use double crochet to join them together then your original motif size won't alter a lot, however if you're going to add another round of treble stitches to each square obviously this will make a big difference. I'm going to finish each square with a round of treble stitches in white and I'm going to use this round to join the squares together as I go. So when taking the measurement of my square I did it with the white border added. If you're going to block your squares you'll also need to do this before taking your measurement.
Once you have these two numbers, blanket size and square size you can work out how many squares you need, then you can weigh your motif to work out how much yarn you're going to need.
I have made a little spreadsheet you can download. You're welcome to use this to do all these sums for you, but I'll talk you through the sums so that you can also understand how these results are created.


Next you need to add the size of the blanket you would like to make, so add your measurements to the line on the yellow table that reads 'Blanket Size' you can use whatever unit you like for this, whether it be cms or inches etc, but make sure you keep to the same unit for both your blanket measurement and your motif measurement. I recommend using cms but only because that's what I'm used to using myself. I'm aiming for a blanket that measures around 203cm x 228cm so these are the numbers I put in.
Next you add your motif size, my motif is square and measures 17cm x 17cm, so these numbers go in your yellow table where it reads 'Motif Size'.
In the second to last row you'll now be able to see how many motifs you need to make your blanket, this is a rounded number, as it's unlikely the size of your motif will fit exactly into the size you're hoping for, therefore in the row marked 'Finished Size' you can see what the measurements will be with the actual motif quantity.
So now we know how many motif's we need to make, but how much yarn do you need to buy?
There are two ways of working this out and I actually used both for my calculations. For the 6 colours that make up the main part of my motifs, I used the weight and for the white that surrounds my squares and joins them all together I used the length of the yarn used.


Above you can see how the spreadsheet looks before you've entered any numbers.
The first thing you need to do is plug in the numbers specific for your blanket. Firstly the details from your yarn, the grams and metres per ball as given on your ball band.Next you need to add the size of the blanket you would like to make, so add your measurements to the line on the yellow table that reads 'Blanket Size' you can use whatever unit you like for this, whether it be cms or inches etc, but make sure you keep to the same unit for both your blanket measurement and your motif measurement. I recommend using cms but only because that's what I'm used to using myself. I'm aiming for a blanket that measures around 203cm x 228cm so these are the numbers I put in.
Next you add your motif size, my motif is square and measures 17cm x 17cm, so these numbers go in your yellow table where it reads 'Motif Size'.
In the second to last row you'll now be able to see how many motifs you need to make your blanket, this is a rounded number, as it's unlikely the size of your motif will fit exactly into the size you're hoping for, therefore in the row marked 'Finished Size' you can see what the measurements will be with the actual motif quantity.
So now we know how many motif's we need to make, but how much yarn do you need to buy?
There are two ways of working this out and I actually used both for my calculations. For the 6 colours that make up the main part of my motifs, I used the weight and for the white that surrounds my squares and joins them all together I used the length of the yarn used.
To calculate with the weight of your motif use the red table as follows; firstly weigh your motif using digital scales to get an accurate measurement. My squares, without the white border, weigh 15g so that's the measurement I enter in the first row of the table. As I aim to use 6 colours equally throughout the blanket I enter 6 in the second row.
If you plan to use different amounts of each colour I'm afraid this table won't calculate that for you, but as you'll have the total number of balls needed, it shouldn't be too difficult to work out yourself.
I calculated the quantity of white needed separately, as each square will have a round of this, therefore I will need white than any other colour. To do this I worked one round around my motif in white, then ripped it out! I then measured the length of the yarn I used. This measured 5.2 metres (520cms). Therefore this is the number that I put in the first row of the blue table. I'm only calculating for one colour here, so the second row is 1. I can now see that I need 12 balls of white yarn.
I now know that I need 8 balls of yarn in each of my 6 colours and 12 balls of yarn in white and I need to make a total of 156 motifs. Now to get to work on all those motifs!
In the next part I will share the pattern for the motif I'm using and explain how I'm joining my motifs as I go.
You can see Part 1 of this series here.


